Integrating Receiptor AI with Google Drive streamlines your receipt and invoice management by automatically storing them in organized folders.
Follow these simple steps to set up the connection:
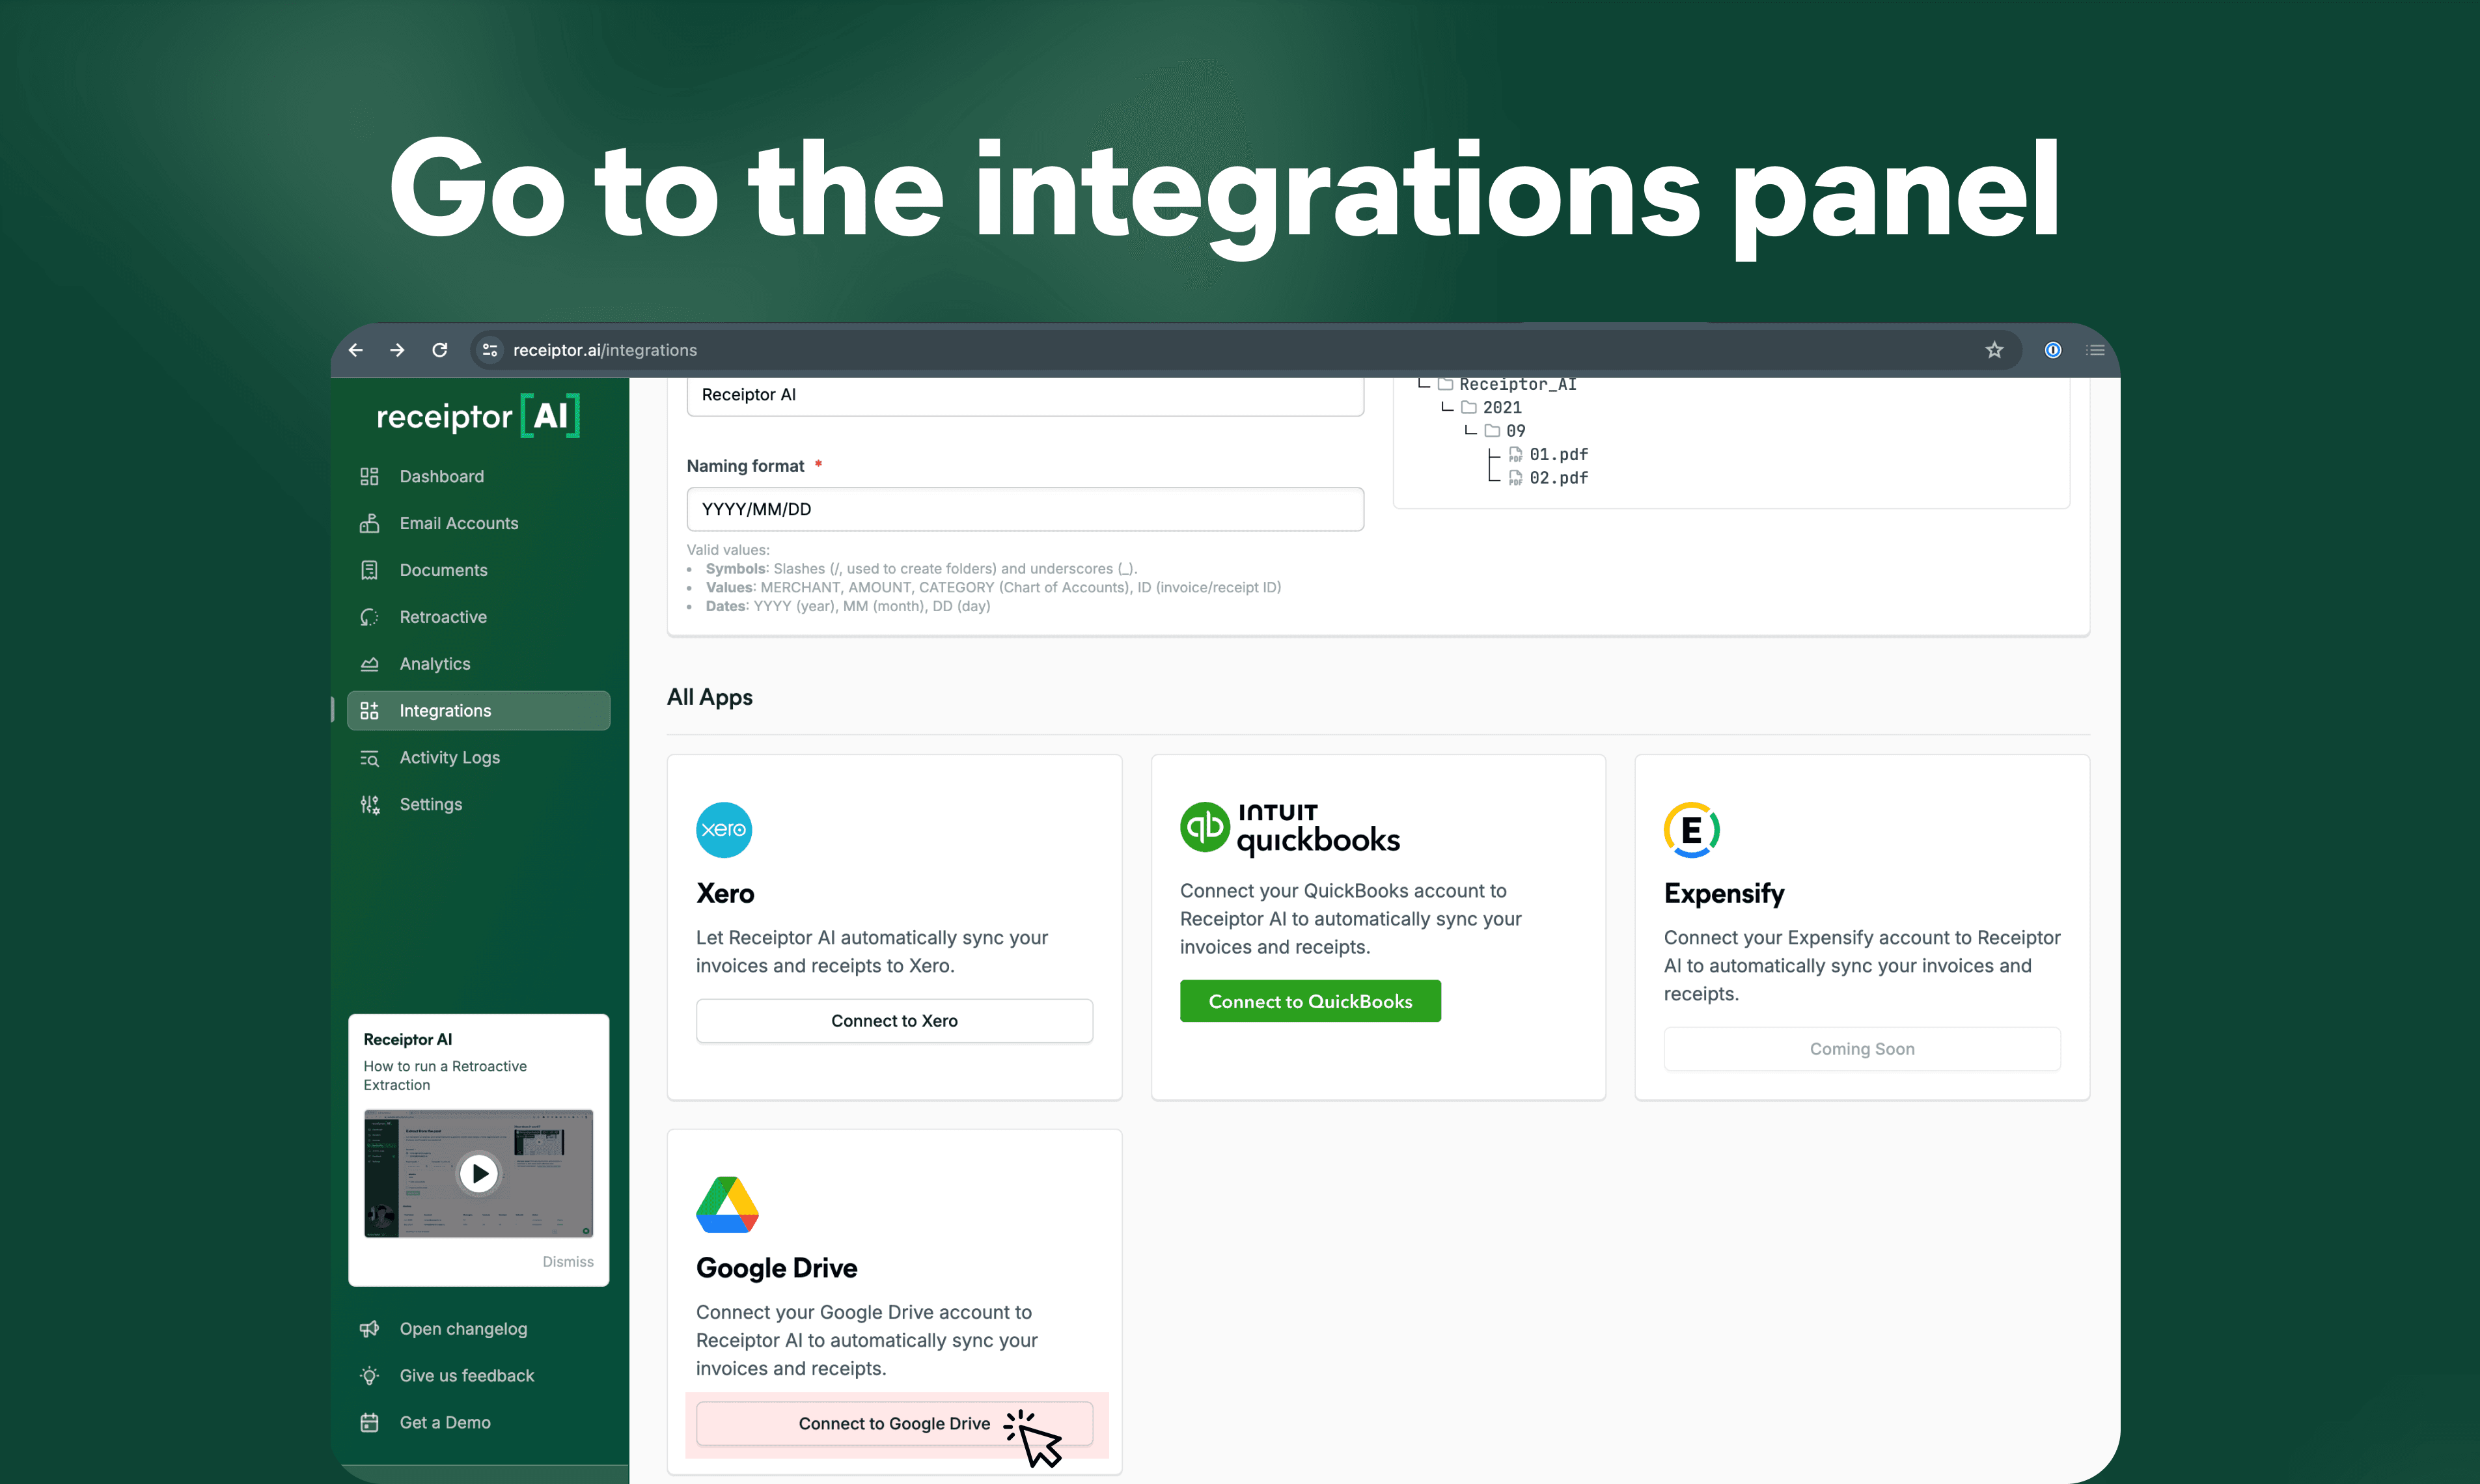
Step #1: Access the Integrations Panel
- Log in to your Receiptor AI account.
- Navigate to the 'Integrations' section on the left side panel.
Step #2: Connect to Google Drive
- In this integrations panel, find the Google Drive section.
- Click on the 'Connect to Google Drive' button to initiate the integration process.
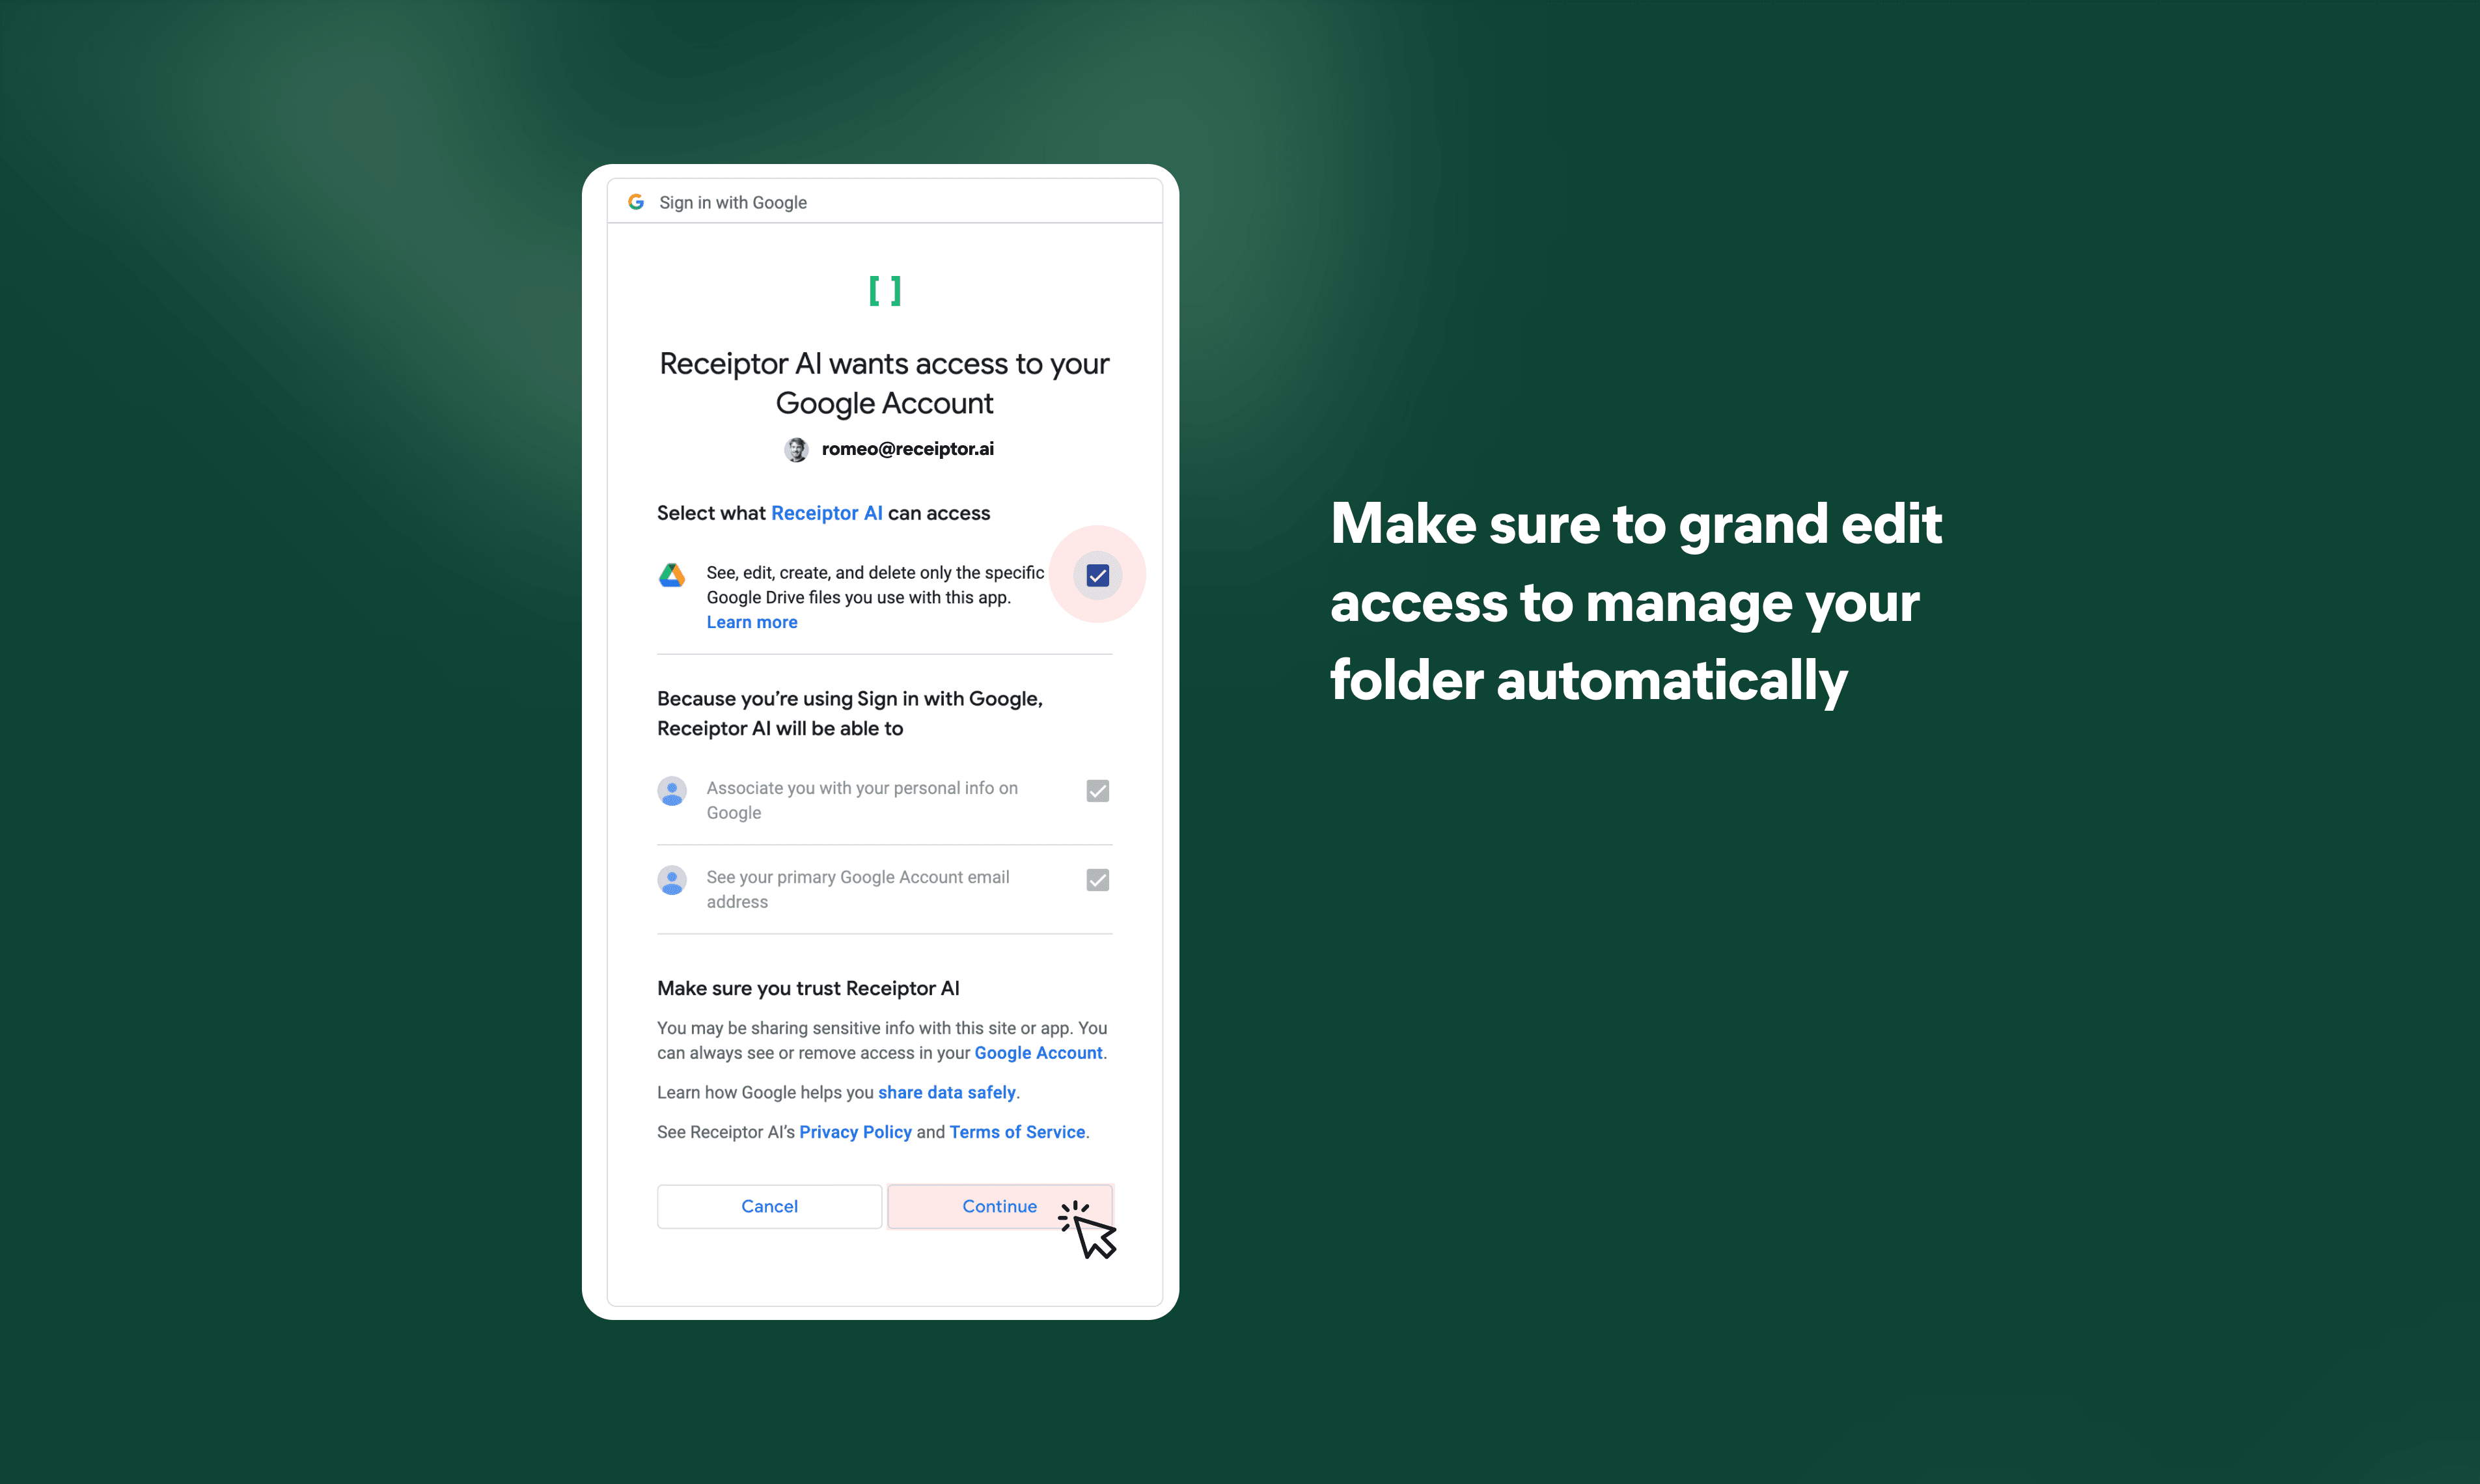
Step #3: Grant Permissions
- A new window will pop up asking you to sign in to your Google account—if you're not already signed in.
- Review the permissions that Receiptor AI will have, ensuring that it can manage your Google Drive files.
- Click 'Continue' to grant those permissions.
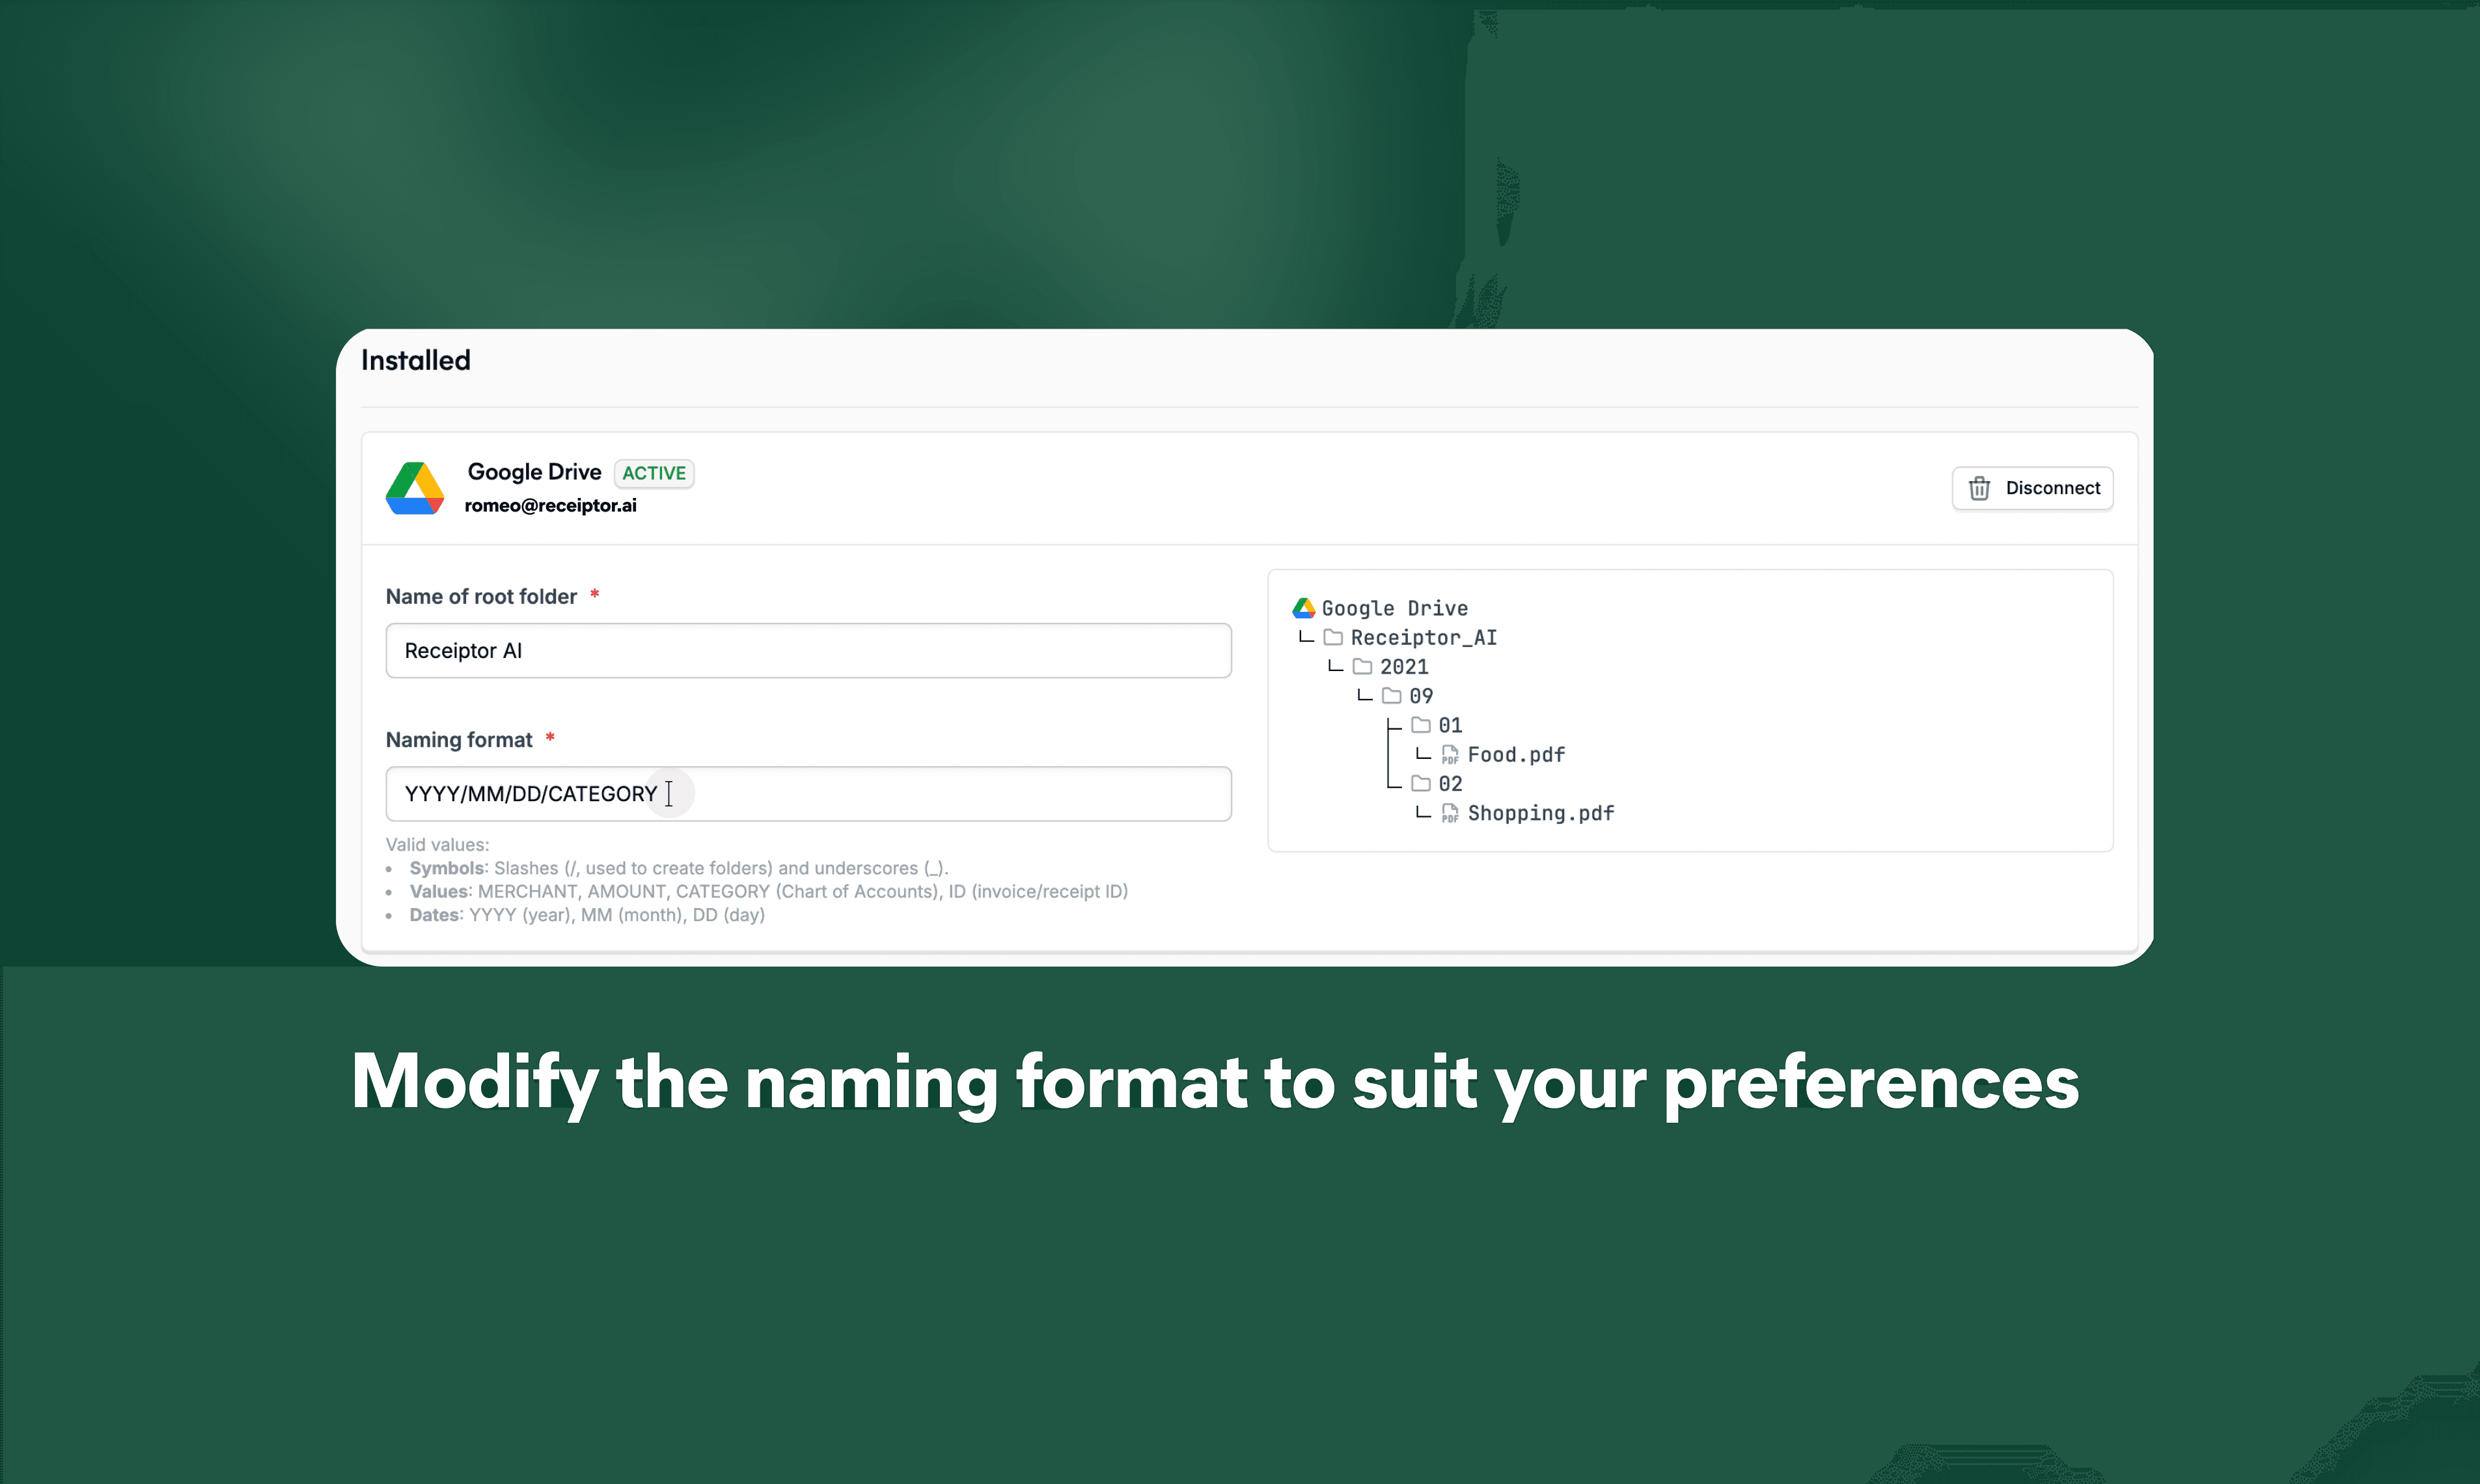
Step #4: Customize Settings
Once connected, you can customize the settings for your folder:
- Set the 'Name of root folder' to organize your documents (e.g., Receiptor AI).
- Choose a 'Naming format' for your files (e.g., YYYY/MM/DD/CATEGORY-MERCHANT_AMOUNT) for easy identification and access.
Step #5: Save and Finalize
After configuring the settings to your preference, make sure to save the changes. Receiptor AI will now automatically parse your emails to find invoices and receipts and store them in the designated Google Drive folder.
Conclusion
You're all set! Your Google Drive is now connected to Receiptor AI, and your documents will be automatically forwarded and organized based on the preferences you set.